Introduction
Bought a laptop, but don’t know how to take care of it? This happens with many people. As a result, the laptop went bad in just a few days. Or else it costs a lot. From the keyboard to the touchpad, everything stops working. And the keyboard is an important part of the laptop and computer, it cannot be said anymore. If the keyboard stops working, a separate keyboard is required. As a result, wherever the laptop is taken, the keyboard must be taken along with it. As a result, it becomes a source of irritation. So be careful in advance. Clean it from time to time. Many people think that it is a troublesome job. And besides, you don’t understand how to clean it. If you also want to know how to clean your keyboard, check out these simple tips.
Essential Supplies for Effective Keyboard Cleaning
The realm of hygiene and maintenance, ensuring the cleanliness of your keyboard is paramount. As our digital companions through countless tasks, keyboards accumulate dirt, grime, and germs over time. To undertake this crucial cleaning endeavor, one must arm themselves with the necessary supplies. Here’s a concise rundown of the essential items required:
1. Isopropyl Alcohol or Gentle Disinfectant:
The cornerstone of keyboard hygiene, isopropyl alcohol or a gentle disinfectant serves as a potent agent against bacteria and viruses. Opt for a solution with a concentration of at least 70% for effective disinfection without causing harm to the keyboard components.
2. Cotton Swabs or Soft Microfiber Cloth:
Precision cleaning demands precision tools. Cotton swabs or a soft microfiber cloth are indispensable for reaching the nooks and crannies between keyboard keys. Their soft texture ensures thorough cleaning without scratching delicate surfaces.
3. Compressed Air Can (Optional):
For a swift expulsion of dust and debris lurking beneath the keys, a compressed air canister proves invaluable. This optional accessory blasts away stubborn particles with precision, revitalizing your keyboard’s functionality.
4. Dish Soap (Mild):
When it comes to tackling stubborn stains on keycaps, a mild dish soap serves as a gentle yet effective solution. A small amount mixed with water facilitates the removal of grease and grime, restoring your keycaps to their pristine state.
5. Water:
The universal solvent plays a pivotal role in diluting cleaning solutions and rinsing away residues. Whether for soaking keycaps or dampening cleaning cloths, water ensures the thorough cleansing of your keyboard components.

Proper Protocol for Disconnecting Keyboards
In the realm of keyboard maintenance, ensuring safety is as paramount as cleanliness itself. To embark on the journey of keyboard care, one must adhere to proper protocol when disconnecting the device from its power source. Here’s a succinct guide on how to execute this crucial step safely:
1. Turn Off and Unplug the Keyboard:
Safeguarding against potential electrical mishaps starts with a simple yet pivotal action: turning off and unplugging the keyboard from its power source. This preventive measure mitigates the risk of electrical surges or short circuits during the cleaning process.
2. Disconnect the Keyboard from Your Computer:
Prioritize safety by severing the connection between the keyboard and your computer. This step is fundamental in preventing inadvertent damage to both devices and ensures a smooth cleaning experience devoid of any electronic hazards.
Safely Remove Keyboard Keycaps
In the meticulous art of keyboard maintenance, one pivotal step stands out: the removal of keycaps. This delicate task requires precision and finesse to ensure the integrity of both the keycaps and the underlying switches. Here’s a comprehensive guide on how to execute this maneuver safely and effectively:
1. Remove Keycaps:
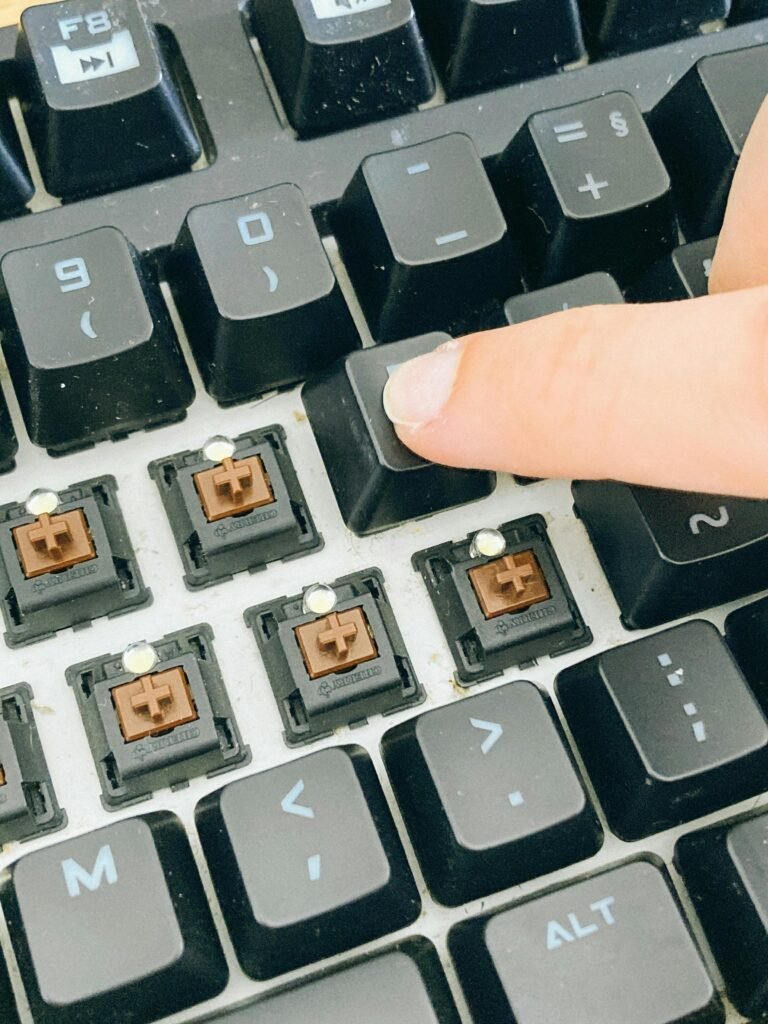
The first step in rejuvenating your keyboard involves delicately removing the keycaps. This can be achieved using either a specialized keycap puller tool or by carefully extracting each keycap one by one.
2. Utilize a Keycap Puller Tool:
For optimal efficiency and ease of use, employing a keycap puller tool is recommended. This specialized device is designed to grasp and lift keycaps without exerting undue force on the switches beneath. Simply position the puller tool beneath the desired keycap, apply gentle pressure, and lift upwards to disengage it from the switch.
3. Exercise Care and Precision:
In the absence of a keycap puller tool, the manual approach can be equally effective if executed with care and precision.
Begin by gently inserting your fingers beneath the edges of the keycap, taking care to apply even pressure to avoid bending or damaging the keycap. Slowly wiggle and lift the keycap until it detaches from the switch underneath.
4. Prioritize Gentleness:
Regardless of the method employed, gentleness is paramount when removing keycaps. Avoid applying excessive force or sudden movements, as this can potentially damage the delicate switches beneath the keycaps. Exercise patience and finesse to ensure a smooth and uneventful removal process.

Step-by-Step Guide to Cleaning Keycaps
In the realm of keyboard maintenance, ensuring the cleanliness of keycaps is essential for preserving both aesthetics and functionality. Here’s a meticulous guide on how to effectively clean your keyboard keycaps to restore them to their pristine condition:
1. Prepare the Cleaning Solution:
Begin by filling a bowl with warm water, ensuring it’s comfortably hot but not scalding. Add a small amount of mild dish soap to the water, creating a gentle yet effective cleaning solution.
2. Soak the Keycaps:
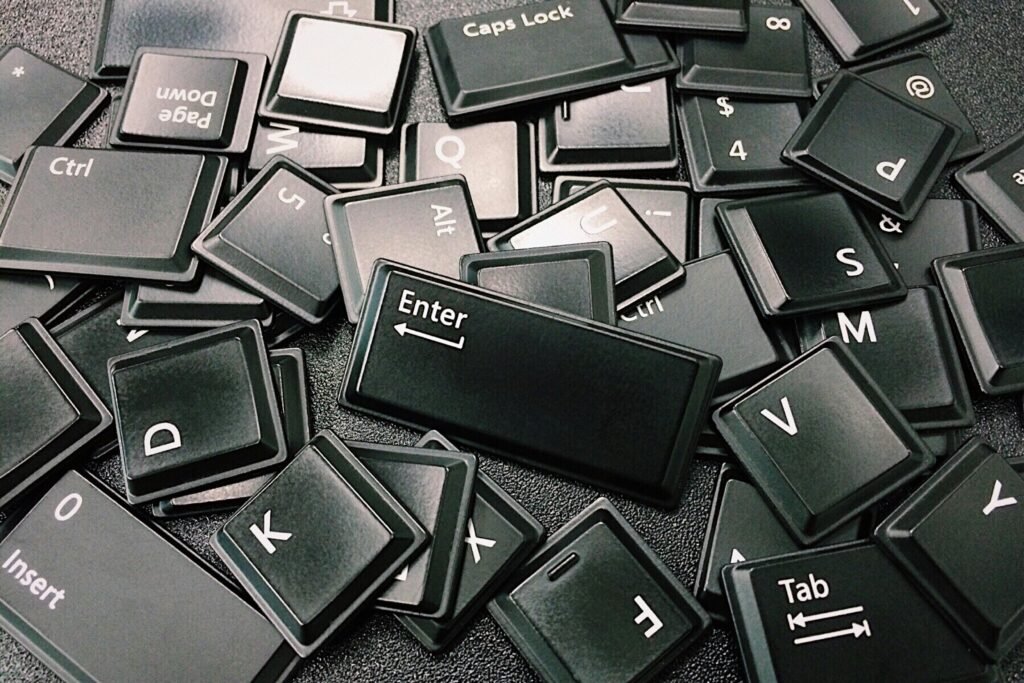
Submerge the keycaps in the soapy water, allowing them to soak for a few minutes. This step helps to loosen and dissolve dirt, oil, and grime accumulated on the surface of the keycaps, making them easier to clean.
3. Gently Scrub Each Keycap:
Armed with a soft brush or cloth, delicately scrub each keycap to dislodge any stubborn residues. Take care to exert gentle pressure to avoid damaging the keycaps or removing their lettering or symbols.
4. Thoroughly Rinse the Keycaps:
Once the keycaps have been thoroughly scrubbed, rinse them under clean running water to remove any lingering soap residue. Ensure each keycap is rinsed completely to prevent any soap buildup.
5. Allow Keycaps to Dry Completely:
After rinsing, place the keycaps on a clean towel or drying rack and allow them to air dry completely. Avoid using heat sources such as hairdryers, as excessive heat can warp or damage the keycaps.
6. Reattach the Keycaps:
Once dry, carefully reattach the keycaps to their respective switches on the keyboard. Take your time to ensure each keycap is properly aligned and securely in place.

Expert Tips for Cleaning Your Keyboard Surface
Maintaining a clean keyboard surface is crucial for optimal performance and hygiene. Here’s a comprehensive guide on how to effectively clean your keyboard surface to ensure a pristine typing experience:
1. Utilize Compressed Air:
Harness the power of compressed air to eliminate dust and debris nestled between the keys and on the keyboard surface. Holding the can upright, direct short bursts of air onto the keyboard, ensuring to cover all areas comprehensively. This method swiftly dislodges particles without risking any moisture damage.
2. Opt for a Soft Brush:
For a more tactile approach, consider using a soft brush to gently sweep away dust and debris from the keyboard surface. Employing a soft-bristled brush allows for precise cleaning, ensuring no nook or cranny is left untouched. Lightly sweep the brush across the keyboard, paying special attention to areas around the keys and crevices.
3. Exercise Caution:
Whether using compressed air or a soft brush, exercise caution to prevent any inadvertent damage to the keyboard surface or components. Avoid applying excessive force or pressure, as this may result in keycap displacement or damage to delicate mechanisms.
4. Regular Maintenance:
Incorporate keyboard cleaning into your regular maintenance routine to prevent the accumulation of dirt and debris. Aim for weekly or bi-weekly cleaning sessions to keep your keyboard surface in optimal condition.
5. Enhance Hygiene:
Prioritize hygiene by occasionally sanitizing the keyboard surface with a mild disinfectant wipe or solution. This additional step helps to eliminate germs and bacteria, promoting a healthier computing environment.

Effective Methods to Disinfect Your Keyboard Surface
Maintaining a hygienic workspace involves more than just keeping things tidy; it requires proactive measures to disinfect high-touch surfaces like your keyboard. Here’s a comprehensive guide on how to effectively disinfect your keyboard surface to promote a clean and healthy environment:
1. Preparation is Key:
Begin by dampening a microfiber cloth with either isopropyl alcohol or a gentle disinfectant solution. Ensure the cloth is not overly saturated, as excess liquid may seep into the keyboard and cause damage.
2. Thorough Wiping Technique:
With the prepared cloth in hand, meticulously wipe down the entire keyboard surface, paying particular attention to high-touch areas such as the spacebar and Enter key. This targeted approach ensures that areas prone to accumulating germs and bacteria are thoroughly disinfected.
3. Mindful Moisture Control:
While disinfecting, it’s essential to maintain control over the moisture level of the cloth. Excessively wet cloths pose a risk of liquid seepage into the keyboard, potentially causing malfunctions or damage to electronic components. Therefore, ensure the cloth remains damp but not dripping wet throughout the cleaning process.
4. Frequent Cleaning Schedule:
Incorporate keyboard disinfection into your regular cleaning routine to prevent the buildup of germs and bacteria. Aim for weekly disinfection sessions or more frequently if the keyboard is shared among multiple users.
5. Enhanced Hygiene Practices:
In addition to disinfecting the keyboard surface, consider implementing other hygiene practices such as washing hands regularly and using hand sanitizer before and after using the keyboard. These simple yet effective measures further reduce the risk of spreading germs and illnesses.

How to Clean Keyboard Switches and Under Keycaps Safely
Ensuring the cleanliness of keyboard switches and the areas beneath keycaps is vital for maintaining optimal performance and longevity. Here’s a detailed guide on how to effectively clean these intricate components without risking damage:
1. Prepare Your Tools:
Begin by dampening a cotton swab with isopropyl alcohol, ensuring it is moist but not dripping. This gentle yet effective cleaning agent is ideal for removing dirt and spills from keyboard switches and keycap undersides.
2. Delicate Cleaning Process:
With the dampened cotton swab in hand, delicately clean the switches and the areas beneath the keycaps. Take care to apply gentle pressure and precision to effectively remove any accumulated dirt or spills without causing damage.
3. Exercise Caution with Liquid Usage:
While cleaning, it’s crucial to be mindful of the amount of liquid used. Avoid saturating the cotton swab or allowing excess liquid to seep into the keyboard, as this could potentially damage the electronic components. Instead, use a conservative amount of isopropyl alcohol to achieve the desired cleaning effect.
4. Thoroughness is Key:
Ensure thorough cleaning of both the switches and the areas beneath the keycaps to eliminate any dirt or spills that may compromise keyboard performance. Take your time and be meticulous in your approach to achieve optimal results.
5. Regular Maintenance Routine:
Incorporate cleaning of keyboard switches and under keycaps into your regular maintenance routine to prevent the accumulation of debris and ensure continued functionality. Aim for monthly cleaning sessions or more frequently if the keyboard is heavily used.
The Crucial Steps to Complete Keyboard Cleaning
Completing the keyboard cleaning process with precision and care is essential to ensure its optimal performance and longevity. Here’s a comprehensive guide on how to properly let your keyboard and keycaps dry before reassembling them:
1. Air Dry Thoroughly:
After the cleaning process, it’s imperative to allow both the keyboard and keycaps to air dry completely before proceeding with reassembly. Place them in a well-ventilated area and allow sufficient time for the moisture to evaporate naturally.
2. Exercise Patience:
Patience is key during this drying phase. Rushing the process may lead to residual moisture being trapped within the keyboard or keycaps, potentially causing damage over time. Allow an ample amount of time for thorough drying to ensure optimal results.
3. Reassemble with Care:
Once the keyboard and keycaps are fully dry, proceed with reassembly with the utmost care and precision. Align each keycap with its respective switch and gently press down until it snaps into place. Ensure all keycaps are securely attached before testing the keyboard.
4. Test for Functionality:
Before resuming regular use, it’s advisable to test the keyboard to ensure that all keys are functioning correctly. Press each key individually to verify responsiveness and confirm that no keys are sticking or malfunctioning.
5. Final Inspection:
Conduct a final visual inspection to ensure that the keyboard surface is clean, dry, and free of any debris. Pay attention to detail to ensure that no residue or moisture remains, as these can potentially affect keyboard performance over time.

Testing Your Keyboard Post-Reassembly
Completing the reassembly of your keyboard marks the final phase of the cleaning process. However, to guarantee seamless functionality, it’s imperative to conduct thorough testing. Here’s how to test your keyboard effectively:
1. Plug In and Power Up:
After reassembling the keyboard, connect it to your computer’s USB port or appropriate interface. Ensure the connection is secure to prevent any interruptions during testing.
2. Systematic Key Testing:
Proceed to test each key on the keyboard systematically. Press each key individually, paying close attention to responsiveness and feedback. Ensure that each key registers the corresponding input on your computer screen.
3. Check for Consistency:
Test keys across all sections of the keyboard, including alphanumeric keys, function keys, and specialty keys. Verify that each key exhibits consistent performance without any delays or irregularities.
4. Monitor for Sticking Keys:
Keep an eye out for any keys that may feel sticky or exhibit abnormal behavior during testing. Sticky keys could indicate residual moisture or debris remaining beneath the keycaps, requiring further cleaning or adjustment.
5. Evaluate Special Functions:
If your keyboard features special functions or multimedia keys, test each of these functions to ensure they operate as intended. Confirm that volume controls, media playback, and other specialty keys function properly.
6. Repeat if Necessary:
In case any issues are identified during testing, repeat the necessary steps to address and rectify them. This may involve reseating specific keycaps, adjusting connections, or conducting further cleaning as needed.
7. Final Validation:
Once all keys have been tested and confirmed to function correctly, validate the overall functionality of the keyboard as a whole. Type a few sentences or perform common tasks to ensure smooth and reliable performance.

Implementing a Keyboard Cleaning Routine
Maintaining a pristine keyboard isn’t a one-time task but an ongoing commitment to cleanliness and functionality. Establishing a regular maintenance schedule ensures your keyboard remains in top condition for optimal performance. Here’s how to incorporate regular cleaning into your routine:
1. Schedule Monthly Cleanings:
Set aside time each month specifically dedicated to cleaning your keyboard. This regular interval allows you to prevent the buildup of dirt, dust, and debris that can compromise performance over time.
2. Assess Usage Frequency:
Evaluate the level of keyboard usage in your environment. If your keyboard sees heavy daily use, consider increasing the frequency of cleanings to bi-weekly or even weekly intervals to maintain optimal hygiene and performance.
3. Designate a Cleaning Day:
Choose a convenient day each month to conduct keyboard maintenance. Whether it’s the first Saturday or last Sunday, having a designated cleaning day helps you stay consistent and ensures your keyboard receives the attention it deserves.
4. Gather Necessary Supplies:
Before each cleaning session, ensure you have all the necessary supplies on hand. This may include isopropyl alcohol, microfiber cloths, compressed air cans, and any other cleaning tools specific to your keyboard model.
5. Thorough Cleaning Process:
Follow a systematic cleaning process to ensure comprehensive coverage. This includes removing keycaps, cleaning switches and surfaces, disinfecting high-touch areas, and allowing ample time for drying before reassembly.
6. Stay Proactive:
Don’t wait for visible dirt or performance issues to arise before cleaning your keyboard. Proactively maintaining cleanliness helps prevent potential problems and prolongs the lifespan of your keyboard.
7. Adapt to Changes:
Be flexible with your cleaning schedule and adapt it as needed based on changes in keyboard usage or environmental factors. Stay attuned to any signs that indicate your keyboard requires more frequent maintenance.
In summary, mastering the art of cleaning keyboard keys is paramount for maintaining both hygiene and functionality. Through a systematic approach involving the use of appropriate tools and cleaning solutions, individuals can effectively remove dirt, grime, and germs from their keyboard keys. From gentle scrubbing with isopropyl alcohol-soaked cotton swabs to thorough drying and reassembly, each step contributes to a pristine keyboard surface.
By adhering to a regular cleaning schedule, ideally on a monthly basis or more frequently for heavily used keyboards, individuals can prevent the accumulation of debris and ensure consistent performance. This proactive approach not only prolongs the lifespan of the keyboard but also promotes a healthier computing environment.
Pingback: Starting a new job – the FIRST DAY of work (5 PRO TIPS for starting a new job on the right foot)